A broken phone screen repair may seem easy at first glance. But behind replacing the display lies meticulous work that only a specialist can do.
It is impossible for it not to have happened to you at least once in your life, since you have owned a phone, either to drop it or to throw it somewhere and have it land somewhere else. That was one of those moments when you held your breath for a second, desperate that you had broken your phone.
And because we are just like you, we place great importance on the appearance of the phone, and a scratch on it feels like a scratch on the soul. Especially since the phone has become an extension of ourselves, being present in all our daily activities.
And because we want you to see what the work of repairing a smartphone display actually involves, we asked our colleague — Klap.ro specialist, Corneliu — to show us every stage he goes through when he “solves” the problem of a broken screen.
How to replace a broken phone screen
In the first step of replacing a display, as part of phone refurbishment, the phone is heated on a special electric hot plate designed for phones. This makes it possible to remove the phone’s protective back cover.
After the phone reaches the optimal temperature, the back cover is detached and a special plastic card is used to remove the back cover.
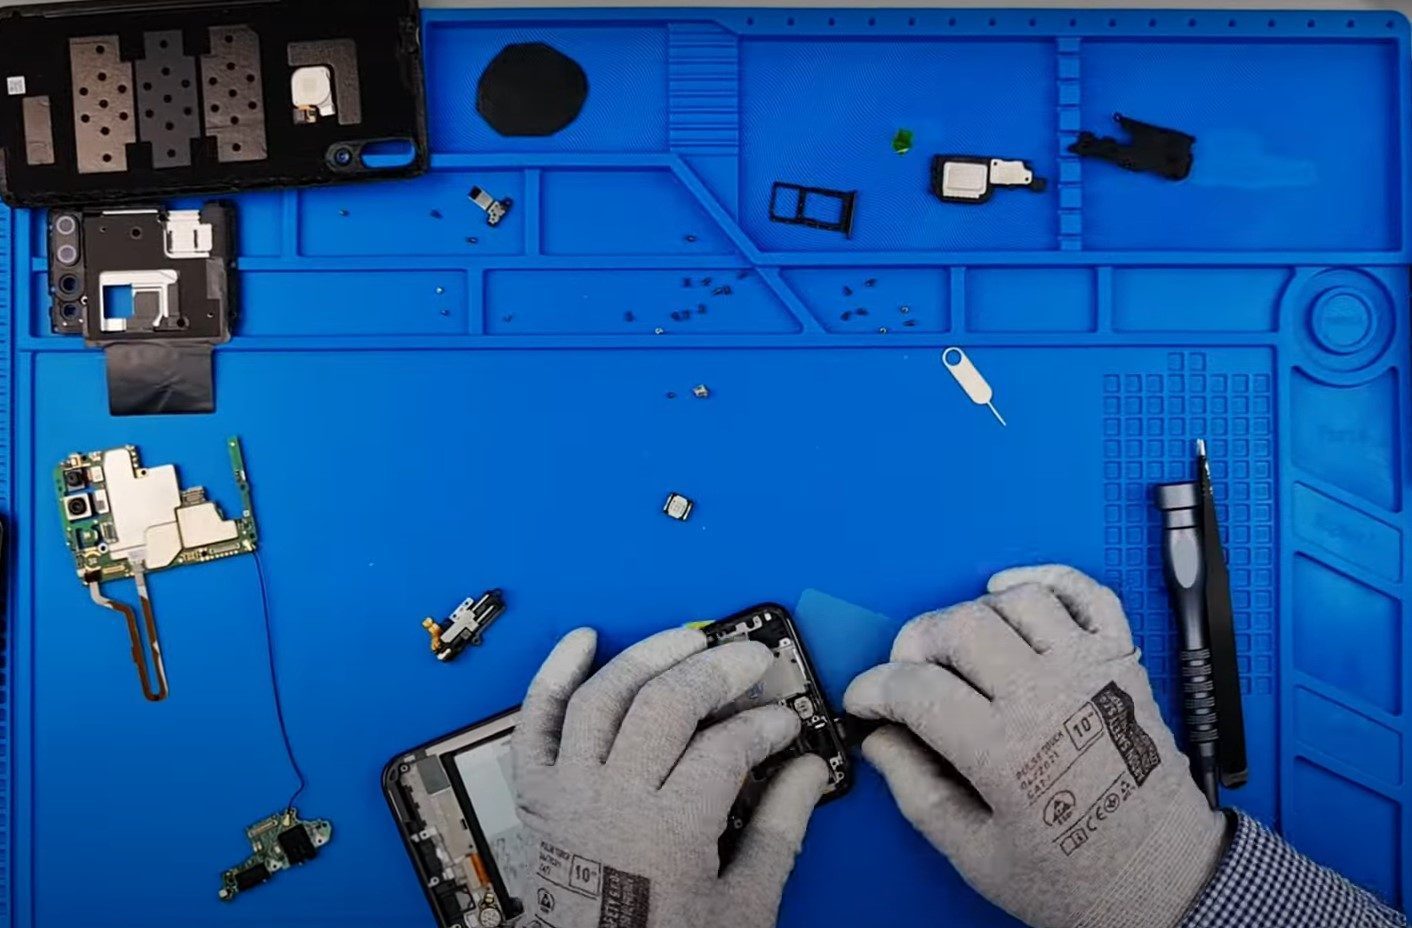
As soon as it has been removed, all the screws holding the phone’s shields in place are taken out.
Now that the phone has been left “bare”, the protective shields that support the motherboard, cameras, and charging module of the phone are carefully removed.
We know, you might say it is not a big deal, but as we mentioned earlier, you need almost surgical precision to work with components that are so small and sensitive.
The new screen is installed
Now that everything necessary has been removed, the parts mentioned above are carefully taken out one by one and mounted onto the new display.
Once all of this has been completed, the protective and support shields are reinstalled on the new display.
Perhaps the most important thing we need to mention in this entire process is related to testing. And here we are referring to the phone’s new display.
It must be tested before the final assembly, to make sure the new screen is fully functional. We know how frustrating it is to come in with a broken phone, expect to receive it back in optimal condition, and then notice that it actually does not work.
After testing the display, we apply a special phone adhesive so that we can glue the phone cover back on. To make sure it sticks properly, 6 or 8 special clamps are mounted, which will speed up the bonding process.
These will stay mounted on the phone for two hours. After the two hours, the process of repairing a broken screen can be considered complete and successful.